2N Indoor View is designed for flush mounting (brick, plasterboard, wood). Use the flush mounting box (Part No. 91378800), which is not included in the package. Alternatively, the product can be surface installed in a wall box or mounted into a desk stand (Part No. 91378802).

|
Caution |
|---|---|
|
Before starting the mechanical installation on a selected place, make sure carefully that the preparations associated with it (drilling, wall cutting) cannot damage the electrical, gas, water and other existing wires and pipes. |

-
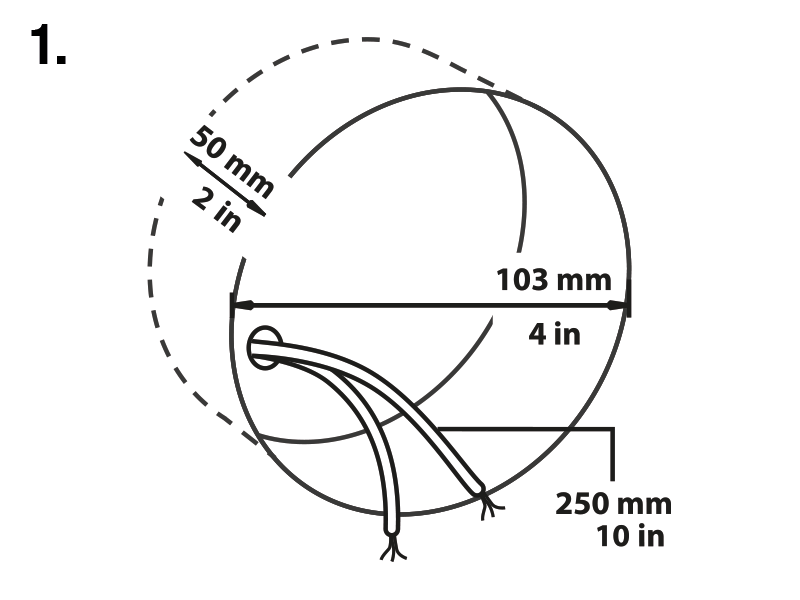
Cut a circular hole in the wall of the diameter of 103 mm and depth of 50 mm before installation. It is assumed that all necessary cables of the maximum length of 25 cm will lead to the hole.

Tip Download the Drilling template from 2N.com .
-
Put the flush mounting box in the hole to make sure that the hole is deep enough.
-
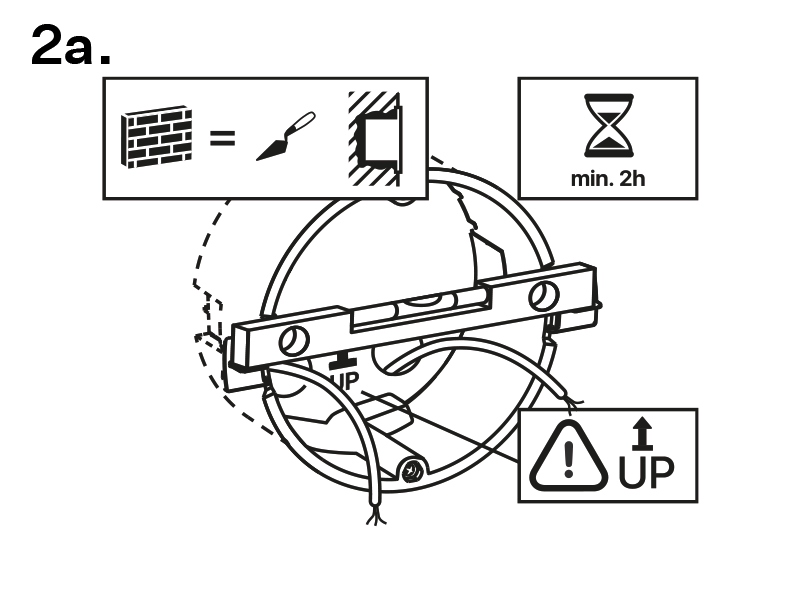
If the hole complies with the box size, wall in the box and level the box using a water level on the holding clips.
-
When the mortar hardens, break off the clips and cap the box with the cover provided. Use anchoring elements to fix the device into plasterboard.
To install 2N Indoor View into a flush mounting box, get a 2.5 mm hexagon key wrench, which is included in the package.

|
Note |
|---|---|
|
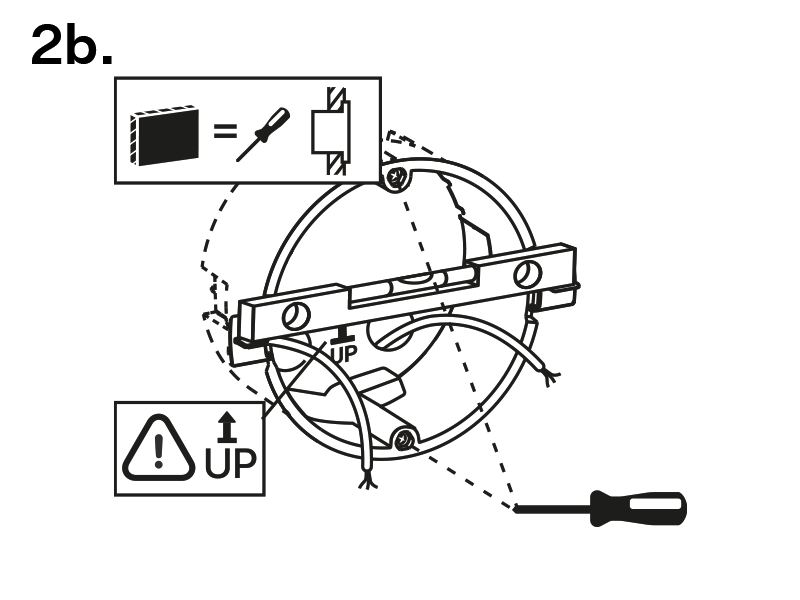
When installing 2N Indoor View into a wall, take the local standards related to installation of electrical devices on flammable material into consideration. |
Can we advise you on anything else?
Take advantage of our technical support and sales specialists.