-
Remove the cover from the walled-in mounting box. Remove the pre-prepared cabling, UTP cable, doorbell twin cable and power supply cable.
-
Shorten the cables to 150 mm or less as required. Connect the doorbell twin cable or power supply cable to the connector provided.
-
Crimp the RJ-45 connector onto the UTP cable.
-
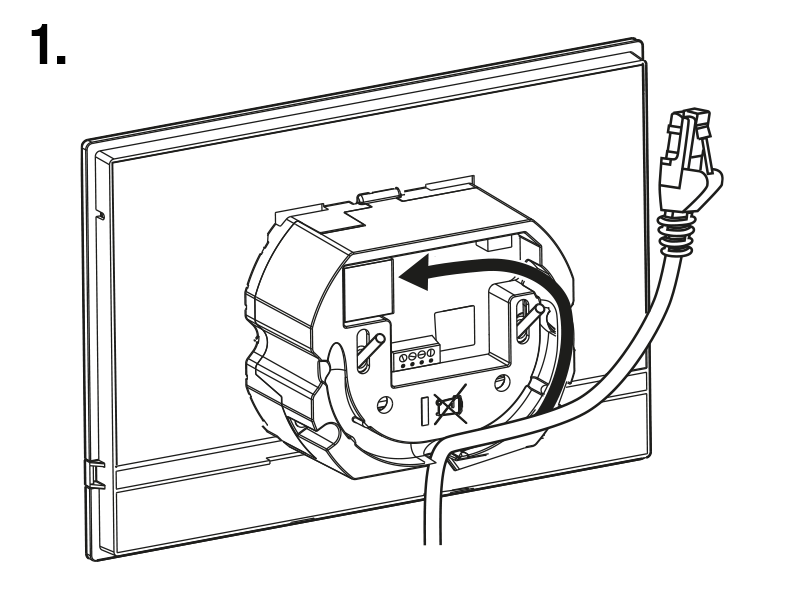
Take 2N Indoor View and lean its bottom edge against the wall below the flush mounting box. First plug the green power/doorbell connector.
-
Connect the LAN connector.
-
Put the cables carefully in the pre-drilled back slot of the device to prevent them from blocking any horizontal levelling movement during the final installation stage.
-
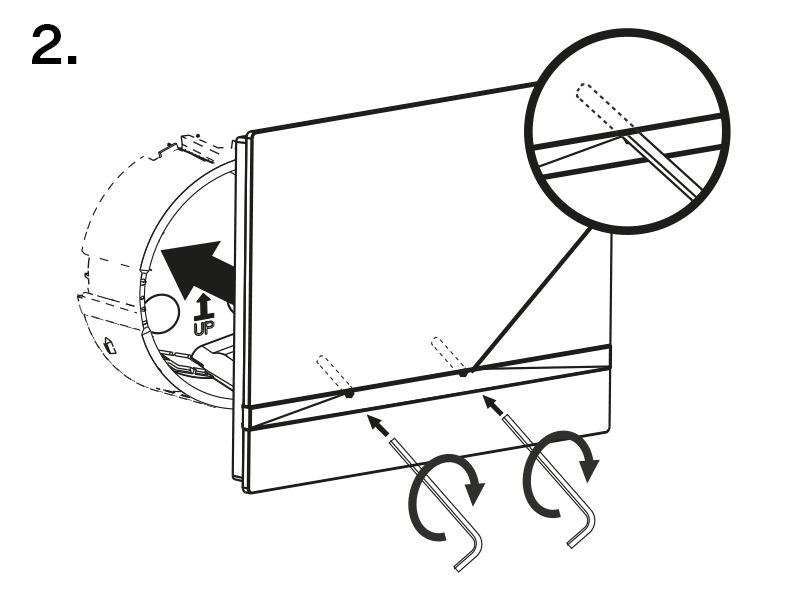
Insert the device in the flush mounting box making sure that it clicks onto the centering pins. The pins allow for a 5–6 ° inclination on either side for accurate horizontal levelling of the device.
Now the device is ready for basic operation. It is necessary to perform software configuration to achieve a full functionality of the device.
Can we advise you on anything else?
Take advantage of our technical support and sales specialists.